Adding voiceovers can take your videos, presentations, and other projects to the next level. Whether you need narration for an explainer video, want to spice up a slideshow, or are looking to add an audiobook feel to your content, recording your own voiceover at home is a great option.
With the right microphone, software, and recording technique, you can capture broadcast-quality audio without needing to rent a professional studio. In just a few simple steps, you can set up an effective at-home voiceover studio and record crystal-clear voice audio tracks to use in a variety of projects.
Read on to learn tips for selecting gear, optimizing your recording environment, delivering compelling narration, and editing your voiceovers.
How to record voiceover recordings with iTop Screen Recorder?
iTop Screen Recorder is a powerful yet easy-to-use screen recording software that lets you capture all on-screen activity into high-quality videos. With just a few clicks, you can record your desktop, webcam, audio, or gameplay and edit recordings right within the app. Key features include:
- Record screen, webcam, audio, and gameplay in up to 4K resolution
- Built-in editor to annotate, trim, merge clips, add effects, and more
- Picture-in-picture and green screen modes for webcam overlay
- Noise reduction and AI voice changing for audio
Here is how to record voiceover recordings with iTop Screen Recorder:
1- Download and Install the iTop Screen Recorder’s latest version from the official website of iTop.
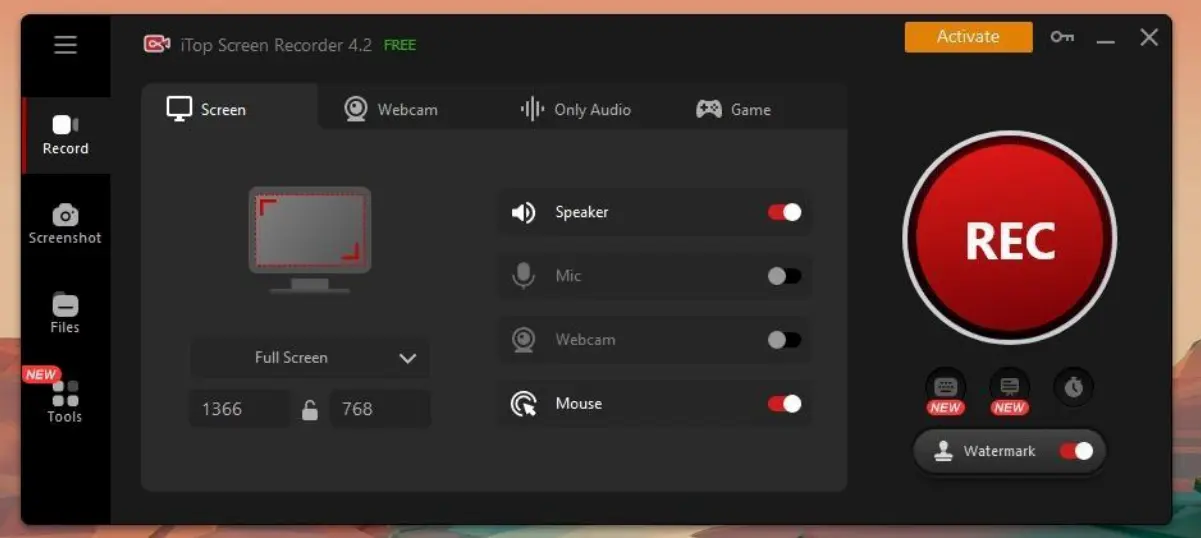
2- Launch the iTop Screen Recorder and go to the “Only Audio” tab. Now, enable the “Mic” and “Voice Changer” options.
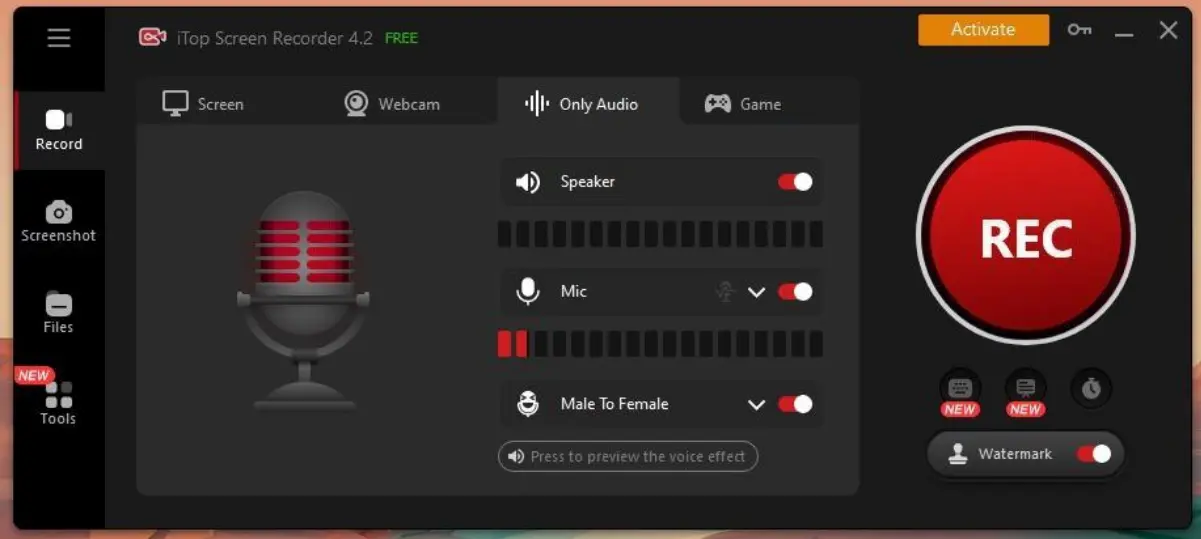
3- Next, select one of the pre-built voice-over effects in the iTop Screen Recorder.
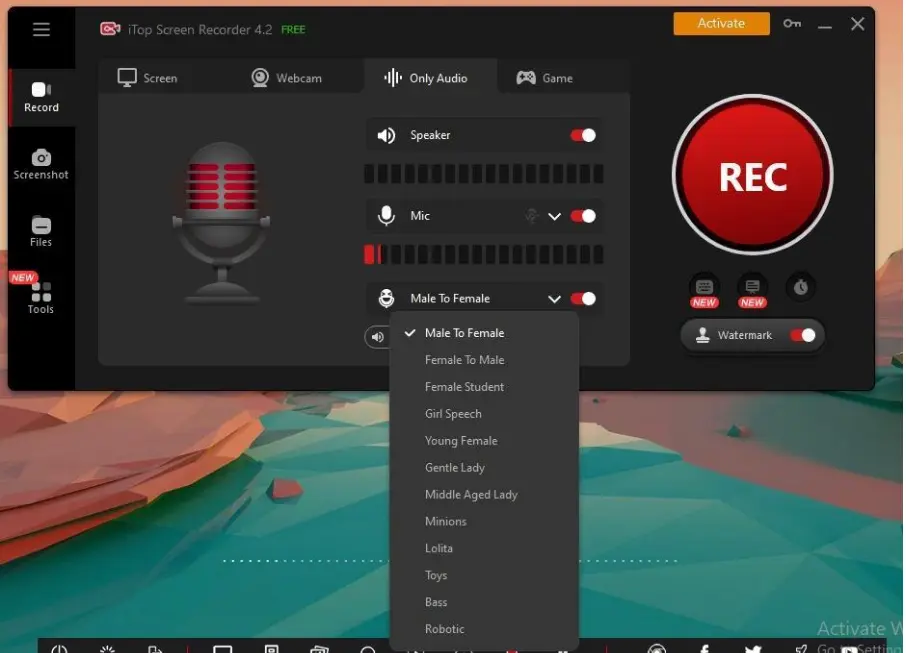
4- Preview the effect that you like and start recording your voiceover audio.
5- Export your audio and add it to any video you like as a voice-over.
How to change voice and edit audio files with iTop Screen Recorder?
One of the standout features of iTop Screen Recorder is its built-in audio editing capabilities. With just a few clicks, you can enhance and transform the audio tracks in your recordings. If you want to spice up a voiceover or add some fun effects to a video, iTop Screen Recorder for PC makes it easy to alter your voice and polish your audio.
The voice-changing feature lets you instantly modulate your tone and timbre with various presets like male, female, robot, and more. You can also remove background noise, amplify quiet sections, merge tracks, and more.
Here is how to change voice and edit audio files with iTop Screen Recorder:
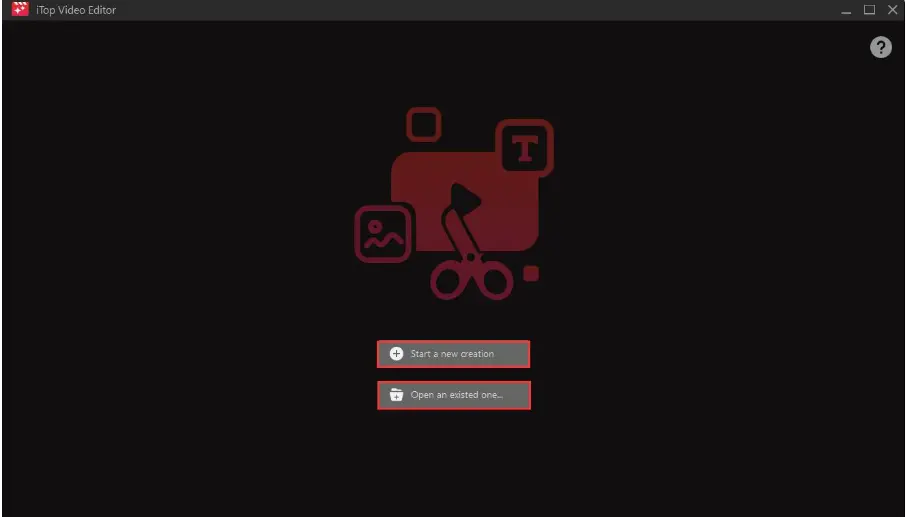
1- After recording your voiceover audio, go to the “Other Tools” section.
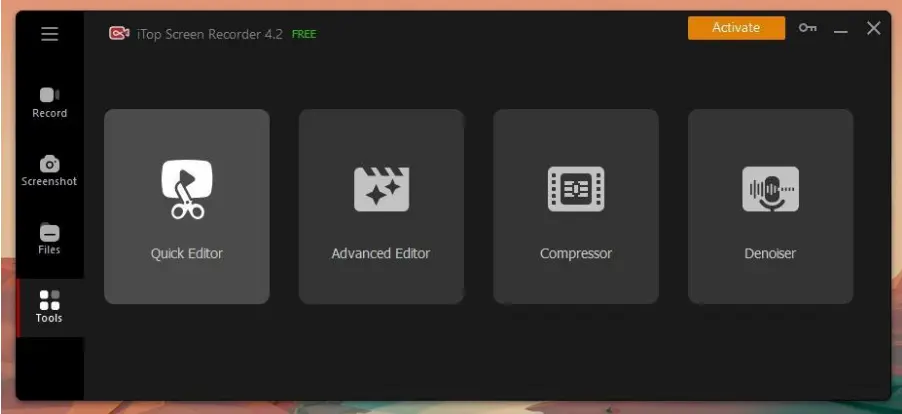
2- Next, click on either the “Quick Editor” or “Advanced Editor” and wait till the editor is opened. Now, select a new recording or an existing one.
3- Once the timeline of the video editor appears, drag and drop the video file into the timeline for which you want to add the voiceover audio.
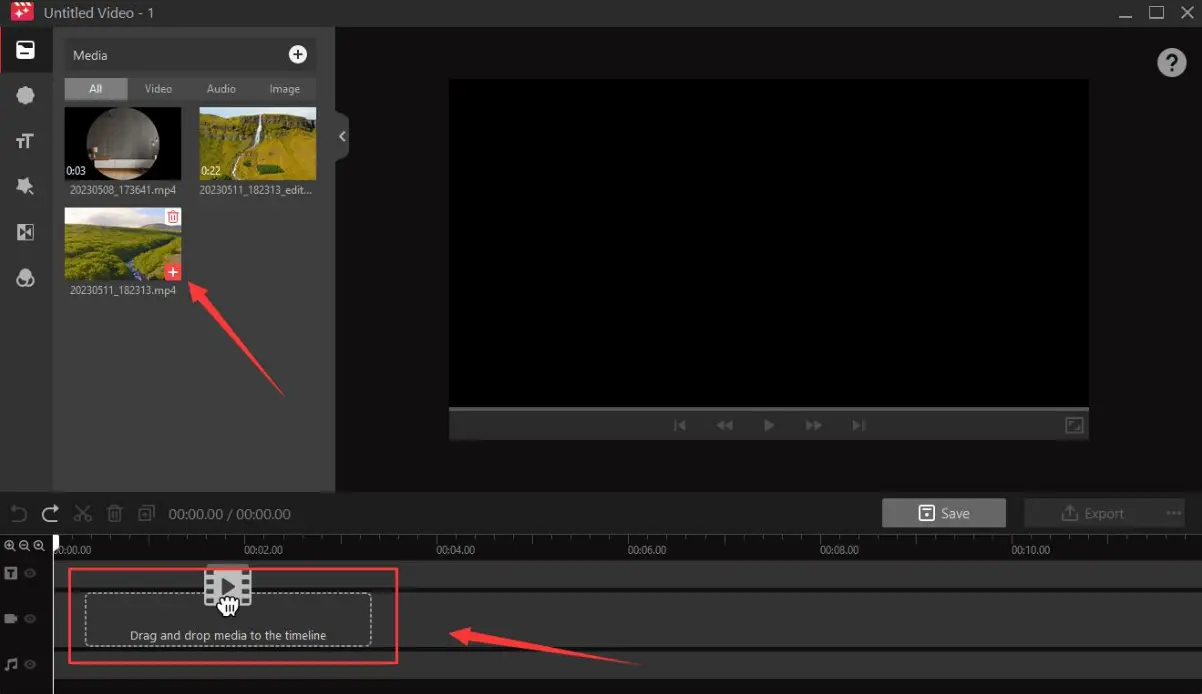
4- Now, drag and drop your new voiceover audio below the video timeline. Once you are satisfied with the editing, export your video with the new Voiceover audio.
Other tips to make your voiceover better
Here are some tips for making your voiceovers sound more professional:
- Get the right microphone – Invest in a good USB condenser microphone designed for voice recording rather than relying on built-in laptop mics. The Blue Yeti or Audio-Technica AT2020 are great starter options.
- Set up a soundproof space – Record in a carpeted room with furniture and fabrics to dampen echoes. Hang blankets on walls or record in a closet to reduce background noise. Get close to the mic in a quiet environment.
- Prepare and practice your script – Read through your script several times to polish the pacing and delivery. Highlight words to emphasize. Time your narration to match animations or edits.
- Record in small sections – Don’t add long sections in one take. Record sentences or paragraphs separately so you can re-record them if needed without starting completely over.
- Listen back with quality headphones – Analyze your takes and re-record any sections that sound off. Quality over-ear headphones will help you catch any imperfections.
- Drink water and do vocal warmups – Hydrate your vocal cords and warm up to avoid dry mouth noises. Humming and lip trills get your voice ready to record.
- Edit out mistakes – Use editing software like iTop Screen Recorder’s built-in audio editor to delete umms/ahhs, pops, and unwanted noises.
Conclusion
Recording professional-grade voiceovers is easier than ever, thanks to modern technology and techniques. While you may not have access to a true production studio, you can set up an effective voiceover rig right from your home. Start by selecting a suitable USB microphone and headphones to capture clean audio.
Dampen noise and echoes in your recording space as much as possible. When it comes time to record, prepare thoroughly, speak dynamically, and capture multiple takes.
Utilize software like iTop Screen Recorder not only to record directly into your computer but also to take advantage of built-in editing tools. Edit out mistakes, optimize levels, reduce noise, and enhance your vocal tone during post-processing.
Aayush Kumar Gupta is the founder and creator of ExploringBits, a website dedicated to providing useful content for people passionate about Engineering and Technology. Aayush has completed his Bachelor of Technology (Computer Science & Engineering) from 2018-2022. From July 2022, Aayush has been working as a full-time Devops Engineer.
